|
Nancy Administrator Posts: 765
8/8/2013
|
NancyAdministrator Posts: 765
For some Sage accounting packages, PrintBoss is distributed with modified versions of standard Crystal Reports for use in printing the most common documents. The modified Wellspring reports have a PrintBoss Trigger included in the Page Header of the report that communicates vital data to PrintBoss. Any Crystal Report can be modified to include a PrintBoss Trigger. However, a custom Crystal Report may not be compatible with the standard PrintBoss Forms.
The PrintBoss Trigger, also known as the “PB#INFO line”, is a string of text in the modified Crystal Report. This string of text provides PrintBoss information necessary to process the document. The information includes the name of the PrintBoss Form file to use, the bank “code” of the bank account to use, the amount from the document, the document recipient, and any miscellaneous information (often a fax number or email address). Minimally, the PrintBoss Trigger only requires the PrintBoss form name. For example: PB#INFO [Blank01]
This communicates to PrintBoss that the document sent from Accpac should use the ‘Blank01’ PrintBoss form.
It is not always necessary to include a PrintBoss Trigger on an Crystal Report. An alternate method of communicating the form and bank account to PrintBoss is to use the PrintBoss Form/Bank Request list. Instructions for configuring the Form/Bank Request list can be found in the PrintBoss Training Note PrintBoss Form/Bank Request List. However, if you are using other modified Crystal Reports with PrintBoss that already have a PrintBoss Trigger, we recommend being consistent.
Steps to create a PrintBoss Trigger
The PrintBoss Trigger is a formula added to the Crystal Reports. This formula consists of 6 or 7 other formulas that are also created and defined in the Crystal Reports. Using Accpac as the example, the fields used in these formulas vary depending on the module used.
1. Create each of the necessary formulas in the Accpac Crystal Reports.

a. Right-click in the Field Explorer window and select New.
b. Enter the name of the field exactly as it is shown in the previous image.
c. Click O.K. The Formula Editor will open.
d. Enter the value for the field.
For example:
i. PrintBossAmnt: IF {@lastPage} then {@fmtISSUED} else "0.00
ii. PrintBossBank: Trim({BKREG.BANK})+':'+Trim({?CMPNAME})
iii. PrintBossDocNo: ToText({BKREG.CHECK},'#')
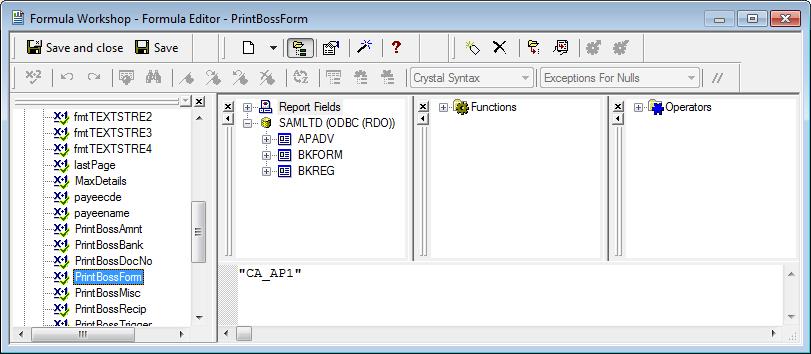
iv. PrintBossForm : “CA_AP1”
v. PrintBossMisc: “ “
vi. PrintBossMisc2: “ “
vii. PrintBossRecip: Trim({@payeename})
e. Click Save.
f. Right-click in the Formula Fields column and select New to create the next formula.
g. Continue until all formulae are created. The last formula will be the PrintBossTrigger.
NOTE: The values in the formulae will vary based on the Accpac module. These values need to be selected from the tables and fields associated with the Crystal Reports. Samples are available in the next section of this document. PrintBossMisc2 is optional and is often used to assign an email address that will be used by PrintBoss.
2. Edit the syntax of the PrintBoss Trigger formula.

a. Select PrintBoss Trigger under the Formula Fields folder.
b. Enter the syntax displayed in the previous image. PrintBossMisc2 is optional.
NOTE: The order of the formulae in the syntax of the PrintBossTrigger is imperative. If your document does not to use a bank account (i.e. an invoice), leave a set of blank brackets in the PrintBossTrigger Bank line as a place holder. For example:

Notice the second line where the PrintBossBank normally resides is blank, leaving a placeholder for this field.
Sample Formulae
Amount
The value of the Amount formula should be the total amount for the document. Multiple paged documents typically have a value of 0.00 for the overflow pages. This is particularly important for checks as PrintBoss uses this amount to evaluate signature ranges. In the following example, the Crystal Reports already had a formula to determine the last page of a multiple-page document. The last page prints the total.

NOTE: Over the years, some check reports print the total on the FIRST page of a multiple-page check. Either way, the total should only be on the first or the last, not all pages.
The following is an example of a payroll check:

In this example, SuppressCheck is a formula used to identify overflow pages when the page number is not 1 and IsNegotiable identifies a live check as opposed to a direct deposit statement. Note that the field or formula used to display the amount also differs by module. The following is an example of an Order Confirmation:

The formula @sOrderTotal was already defined in the Crystal Reports. When the document will only have one page, a simple ToText command can be used as illustrated in the following OE Credit:

Regardless of the method used to identify the page, it is important to always use the field or formula unique to the Accpac module that provides the total amount for the document.
Bank
Enter the proper value of the Accpac “Bank Code” followed by a colon followed by the Accpac Company Name. This will allow PrintBoss to distinguish between the accounts if the exact same bank code is used by more than one Accpac Company (i.e. “PRBANK” for Sample Company Inc. vs. “PRBANK” for Sample Company Ltd.).

The fields and format are the same for both AP and Payroll in Accpac.
Document Number
Enter the proper formula for the document number.

The previous image displays the DocNo for a check. This formula will vary by Accpac module. Following examples are from the OE module in Accpac.
Order Confirmation, Picking Slip, and Quote

Picking Slip based on Shipment Table

OE Credit Note

Invoice

Purchase Order

PrintBoss Form
Enter the name of the PrintBoss Form file to be used with this Crystal Reports. The form name should be surrounded by quotes and should NOT contain the “.pbf” extension.
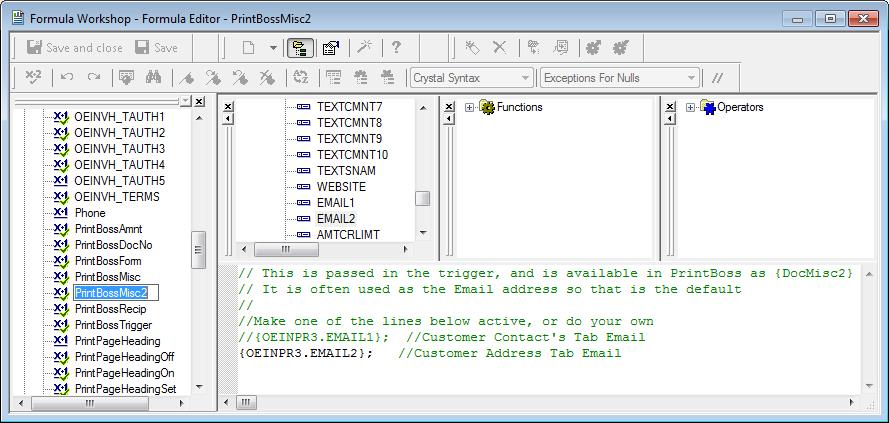
Miscellaneous
Enter the proper formula for the value you want to enter in the miscellaneous field to use with PrintBoss. PrintBossMisc has a limit of 25 characters and is often used print fax numbers. PrintBossMisc2 has a limit of 40 characters and is often used to print email addresses. In the case of a fax number, ensure the formula entered provides the exact fax number to be used by PrintBoss, including area code.

NOTE: A “PrintBossMisc” formula is required in the PrintBossTrigger, even if you are not using the miscellaneous field. The syntax of the formula in these cases should be a space between quotes. Do not enter two quotes without the space. The space is also required. The PrintBossMisc2 field is optional and does not need to be included in the PrintBossTrigger. If it is included, the formula needs to include an email field or at least a space between quotes, similar to PrintBossMisc.
Below is an example of using PrintBossMisc2 for email with an Invoice:
Document Recipient
Enter the proper value for the document recipient. Following is an example for AP and AR.

As with many formulas, the PrintBossRecip varies by module. Below are other examples of PrintBossRecip.
Payroll

Invoice, Order Confirmation, OE Credits, Picking Slip, and Quote,

Picking Slips using the Shipping Table

Purchase Order

Test each of the “PrintBoss” formula
Once each of the formula has been created, test them to ensure they do not return any errors. Test the “PrintBossTrigger” formula only after creating all of the other formulae.
1. Navigate to the Field Explorer  in the selected Crystal Reports. in the selected Crystal Reports.
2. Right click on the first PrintBoss formula, PrintBossAmnt, and choose Edit. The Formula Workshop – Formula Editor will open.
3. Click in the Editor panel and select the Check button. Typically the icon in Crystal for testing the formulas looks like  . .
4. Continue to the next formula once Crystal Reports indicates “No errors found”. Otherwise, fix the error before continuing. Typically, Crystal Reports will indicate the type of error.
5. Select PrintBossTrigger last and Check. Click Save and Close when there are no errors found.
6. Save the Crystal Report.
Place the PrintBossTrigger formula onto the report
Once all the formulae have been created and tested, place the “PrintBossTrigger” formula onto the Crystal Report by dragging it from the Field Explorer window. Things to consider with placement of the PrintBossTrigger formula:
· It must be visible.
· It must appear on every page of the document. Therefore, it should be placed in a Page Header of Page Footer section.
· It cannot overlap other items in the report.
· It may be any font size (you may make it smaller to fit your space). Typically the font size is 8, the color is blue, the X value is 0.030 and the Height is 0.080.
· The full length of the data must be on a single line. DO NOT allow the trigger to wrap to a second line. Typically, the object is stretched the full width of the page to avoid being truncated.
NOTE: When the document is printed to Preview in Accpac, the full length of the data in the PrintBossTrigger formula should be visible. PrintBoss will automatically remove the PrintBossTrigger from the data during the print processes so it will not appear on the formatted document.
Troubleshooting the PrintBoss Trigger
The first step when troubleshooting a PrintBossTrigger is to print to Preview in Accpac using the modified report.
All the data should be visible along with the PrintBossTrigger containing the rendered formula values. Here is an example of a PrintBossTrigger printed to Preview (note that it is truncated here to fit the document):

· If the PrintBossTrigger does not display on the document preview, confirm that it is set to be VISIBLE in the Crystal Reports.
· If the PrintBossTrigger formula is set to visible and still does not appear on the Preview, it implies there is an error in one or more of the formulae in the PrintBossTrigger formula.
· It is helpful during the testing phase to place each of the formulae visibly on the Crystal Reports to view the results for each one. If one or more do not appear, edit the values to generate the proper results.
· In the case of the “PrintBossMisc” formula, remember there should be a SPACE between the quotes when no value or field is entered. You may prefer to enter a dash instead of a space between the quotes to confirm is this formula is working properly.
edited by Nancy on 8/8/2013
edited by Nancy on 8/8/2013
|